How to Deploy Vaadin 14 App To Heroku
Blog post about how to deploy Vaadin 14 application to Heroku Cloud.

In this tutorial, we’ll go through the process of building a simple Vaadin 14 application and deploying it to Heroku cloud using heroku-maven-plugin.
Vaadin is an open source web framework which helps Java developers to create UI for web applications.
Since Vaadin 14 npm is used as the front-end package manager. Although using Bower for frontend dependencies is currently discouraged, it is still fully supported in Vaadin 14, but will be deprecated in Vaadin 15.
Heroku is a platform that enables developers to build, run, and operate applications entirely in the cloud.
1. Prepare Vaadin Application
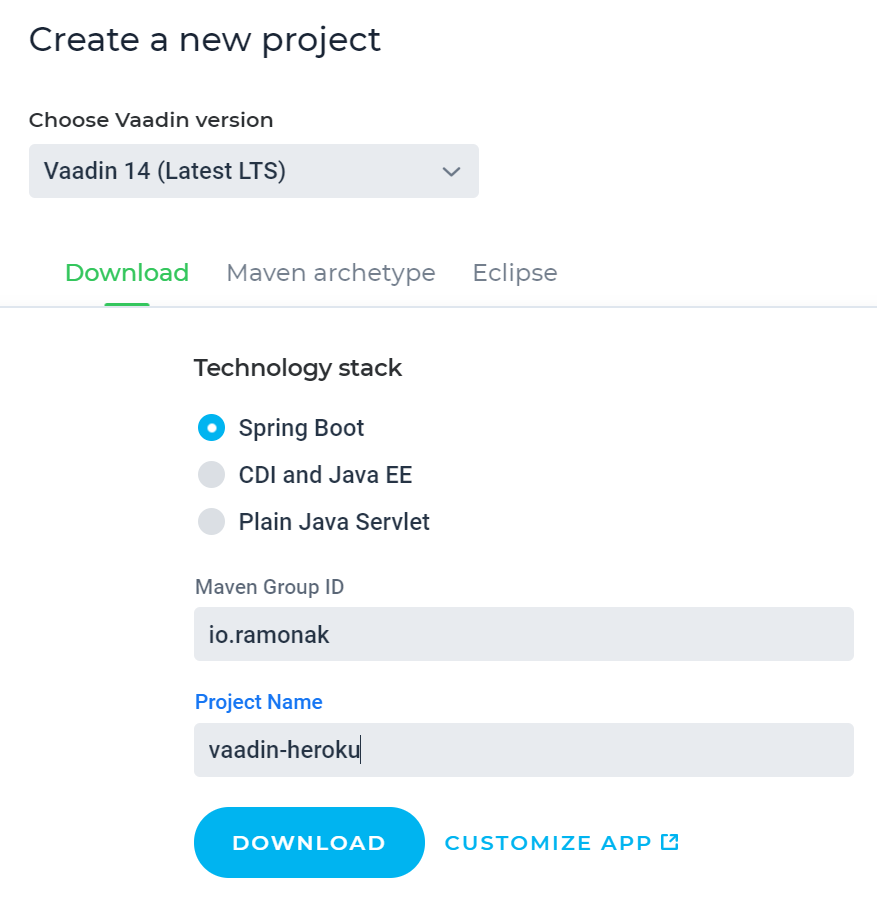
The most simple and convenient way to start building Vaadin application is to use Vaadin Starter Project. For that, we go to https://vaadin.com/start, chose the latest Vaadin version (which is 14 as of December 2019), Spring Boot tech stack, enter Maven Group ID and the Project Name. Press download button.
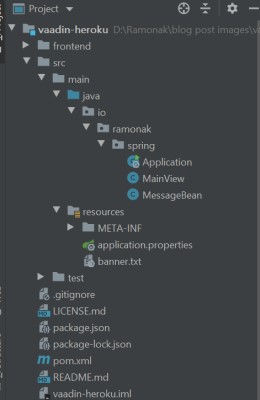
Once you have the project downloaded, unzip the folder and open the project in your favorite IDE.
The project folder has a few files and folders.
It is a fully functioning web application. To run it we enter command in terminal:
mvn spring-boot:run
Once the build is finished and the application is running, navigate in browser to localhost:8080 and you should see basic Vaadin application.
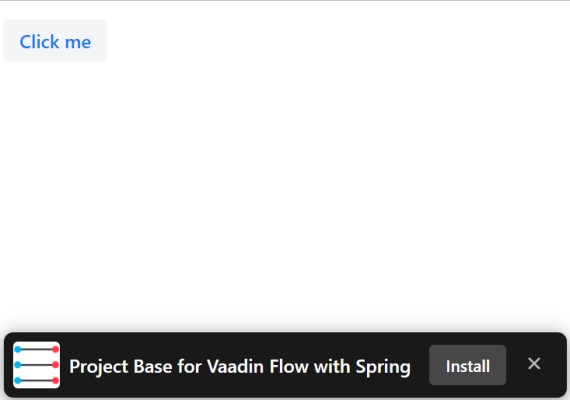
The bar at the bottom of the page indicates that it is a PWA. You can read about it in this blog post.
2. Create a Heroku app
If you don’t have a Heroku account, you should sign up.
Also, we need to install the Heroku Command Line Interface (CLI) which makes it easy to create and manage Heroku apps directly from the terminal. The instructions on the installation of Heroku CLI is here.
From now on we’ll be using the command line to communicate with Heroku.
Log in to your Heroku account
heroku login
Press any button and you’ll be redirected to Heroku login page.
Now we’re ready to create our Heroku application by entering
heroku create <app_name>
where <app_name> – is the name of your app (you can name it whatever you like). For this tutorial I’ll be using the name vaadin-heroku-app. So I enter
heroku create vaadin-heroku-app
Now we have an empty Heroku application.
3. Update Vaadin project
Next we need to update pom.xml to be able to deploy Vaadin project to Heroku.
- First of all, in build tag add frontend-maven-plugin. This plugin downloads/installs Node and NPM locally for the project.
<plugins>
    <plugin>
        <groupId>com.github.eirslett</groupId>
        <artifactId>frontend-maven-plugin</artifactId>
          <!-- Use the latest released version:
            https://repo1.maven.org/maven2/com/github/eirslett/frontend-maven-plugin/ -->
        <version>LATEST_VERSION</version>
        ...
    </plugin>
…
- Configure this plugin by adding execution goals and node version.
<executions>
   <execution>
             <id>install node and npm</id>
       <goals>
           <goal>install-node-and-npm</goal>
       </goals>
       <phase>generate-resources</phase>
   </execution>
</executions>
<configuration>
   <nodeVersion>v10.16.2</nodeVersion>
</configuration>
- In production profile for vaadin-maven-plugin add execution goal prepare-frontend
<profiles>
   <profile>
       <id>production</id>
       <properties>
           <vaadin.productionMode>true</vaadin.productionMode>
       </properties>
       <dependencies>
           <dependency>
               <groupId>com.vaadin</groupId>
               <artifactId>flow-server-production-mode</artifactId>
           </dependency>
       </dependencies>
       <build>
           <plugins>
               <plugin>
                   <groupId>com.vaadin</groupId>
                   <artifactId>vaadin-maven-plugin</artifactId>
                   <version>${vaadin.version}</version>
                   <executions>
                       <execution>
                           <goals>
                               <goal>prepare-frontend</goal>
                               <goal>build-frontend</goal>
                           </goals>
                       </execution>
                   </executions>
               </plugin>
…
- And finally add heroku-maven-plugin with following configuration
<plugin>
   <groupId>com.heroku.sdk</groupId>
   <artifactId>heroku-maven-plugin</artifactId>
   <version>2.0.13</version>
   <configuration>
       <appName>vaadin-heroku-app</appName>
       <processTypes>
   		<web>java $JAVA_OPTS -jar target/vaadin-heroku-2.0-SNAPSHOT.jar --server.port=$PORT</web>
       </processTypes>
   </configuration>
</plugin>
Heroku-maven-plugin provides direct deployment of prepackaged standalone web applications to Heroku.
Tag < appName > is the name of your Heroku app and is necessary only if your application is not under version control with Git.
Tag < web > tells Heroku to start a web process and run .jar file.
To deploy Vaadin app in production mode to Heroku enter following command from the project directory
mvn clean package -Pproduction heroku:deploy
After a successful build you can open the app by entering
heroku open -a <app_name>
Or go to the browser and navigate to <app_name>.herokuapp.com, that in case of this tutorial is vaadin-heroku-app.herokuapp.com
Conclusion
Full source code for this tutorial is available at GitHub repository.
The idea for this blog post was born after unsuccessfully trying to deploy Vaadin 14 app to Heroku. I had [almost] no problems while deploying to Heroku Vaadin 10+ versions. But Vaadin 14 was a different case (mostly due to including npm).