Motivation
As a developer who tries to contribute to the community by writing blog posts, developing and maintaining open-source libraries, and building side projects, I’d like to have a place where I could see and track all these my activities in one place. So I decided to create the dashboard of my personal projects.
Tech Stack
For the tech stack I’ve chosen to use:
- Next.js
- TypeScript
- Material UI
- Recharts - charting library
- react-spring - animation library
- MongoDB Atlas - cloud-hosted Mongo Database
Overview
The app has a “classic” dashboard layout:
- header
- dark and light theme switch
- sidebar with toggle
- content area
- footer
Also, the app uses ESLint custom rules, prettier code formatting, husky git hooks with lint-staged.
Pages
The dashboard consists of 5 pages:
- Overview of my blog posts, npm packages demo, and hobby apps stats
- dev.to stats
- GitHub stats
- Twitter stats
- NPM packages stats
Page 1 - Overview of my blog posts, npm packages demo, and hobby apps stats
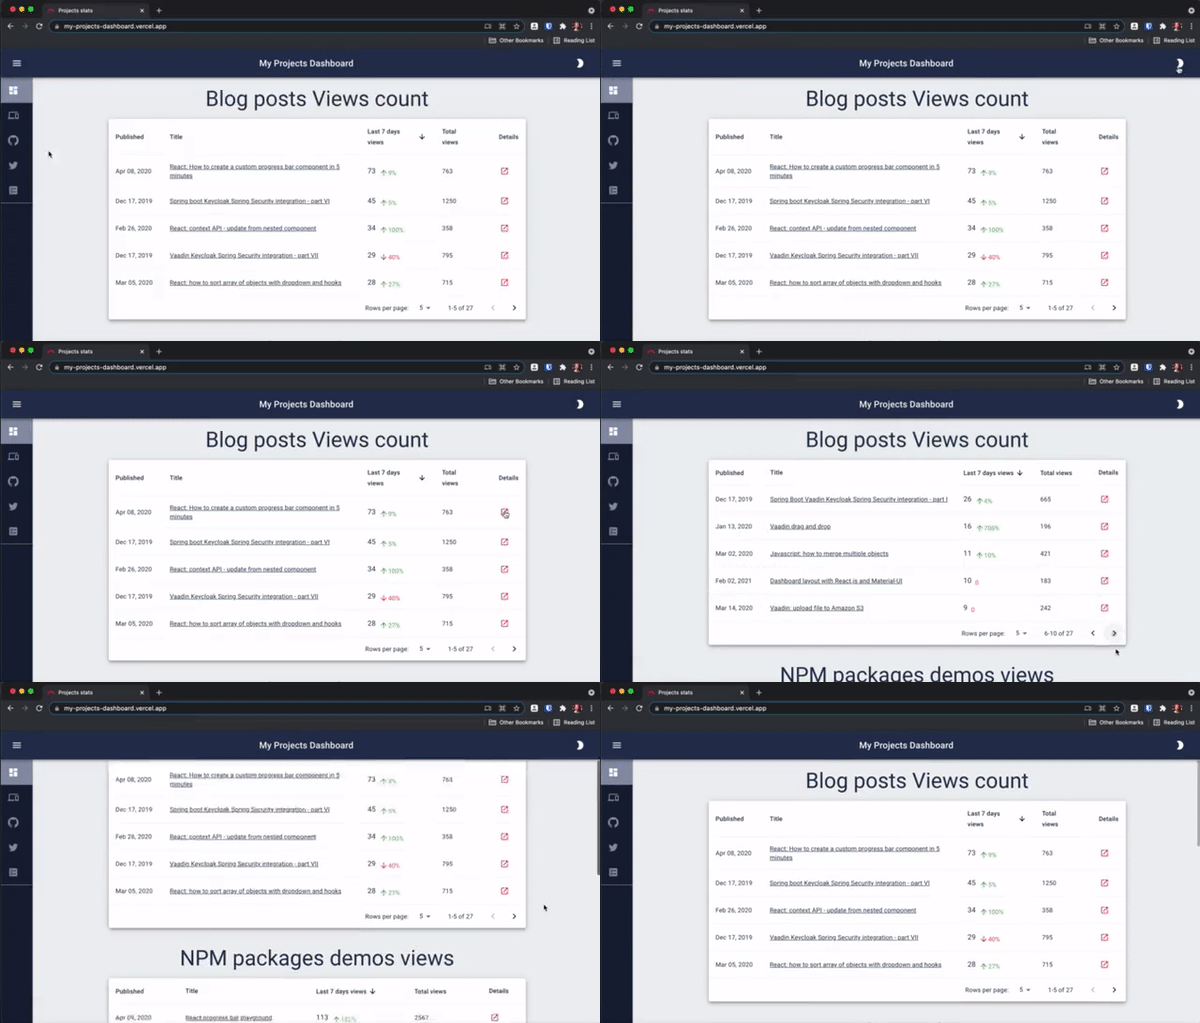
The first page displays the main stats of the blog posts on my personal website, of the npm packages demos that I developed and maintain, and of the hobby apps that I wrote in my spare time. These stats are rendered in the table and include:
- the date of publishing
- the title, which also serves as a link to the respective blog post/demo/app
- this week number of weeks with comparison to the previous week
- total views count
- modal window with the chart that shows the number of views for each day during the last month
Published, Last 7 days views and Total views columns are sortable. By default, the data is sorted by the number of views for the last 7 days. The blog posts table has pagination.
The data about the views count is stored in MongoDB Atlas database. There is a dedicated Next.js API Route that communicates with the database. To be able to gather these stats, I developed a custom hook - useViewCounter.
Probably another part that was tricky to implement on this page is the feature of sorting the Material UI table by specific columns. This is how I implemented it.
Page 2 - dev.to stats
I’m a follower of the “Learn in public” concept. When I learn something new while working on a project and I write an article on it, I definitely know the subject better later. Plus I hope this also helps other developers in their “gaining new knowledge” journey.
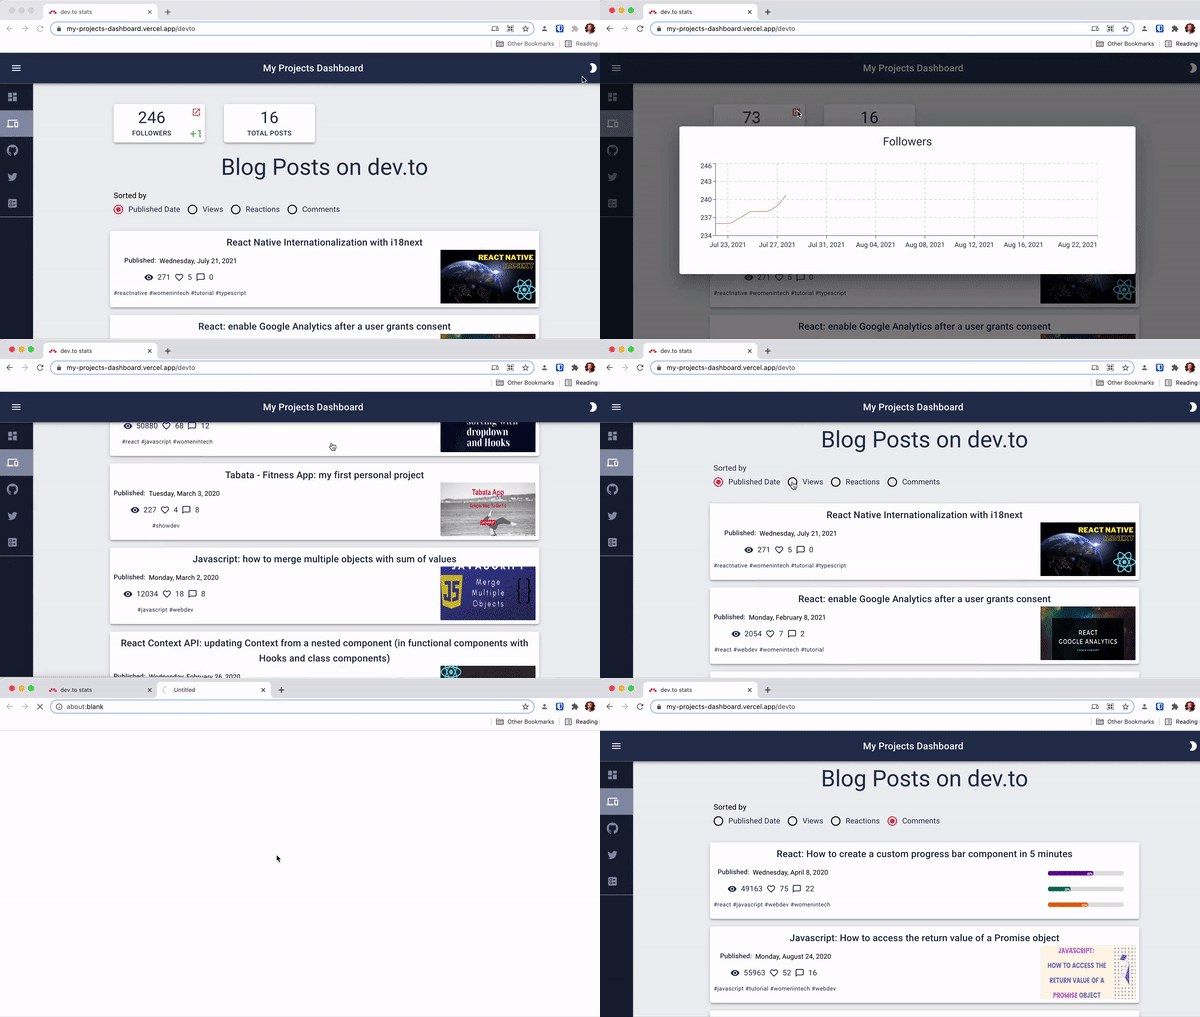
To use dev.to API you just need to obtain the API key. How to do so is described in the official docs.
There are two stat cards at the top of the page. They show data about followers count and the total number of posts for today. The data is gathered from https://dev.to/api/followers/users and https://dev.to/api/articles/me APIs respectively. “Running numbers” animation implemented with the react-spring library.
Also, there are dynamics of followers count chart. But dev.to API provides data only for the current number of followers. Where do I get the data for the previous days? To be able to display this data we need to:
- store followers count in the database (for this I use MongoDB Atlas)
- run the cron (scheduled) job for this to happen daily (GitHub actions to the rescue)
The number at the bottom right corner of the followers’ count card shows the followers’ number change for the last week.
The main section of the page consists of cards with information about each blog post. This data is fetched from https://dev.to/api/articles/me API. Each card has information about:
- article’s title
- date of publishing
- number of views, reactions, and comments
- tags list
- cover image
The card is clickable. By clicking on it, the article opens in a new tab, using the URL data from the API.
All blog posts can be sorted by the published date (sorted by default), number of views, reactions, or comments. How to implement this feature is described in this blog post.
Page 3 - GitHub stats
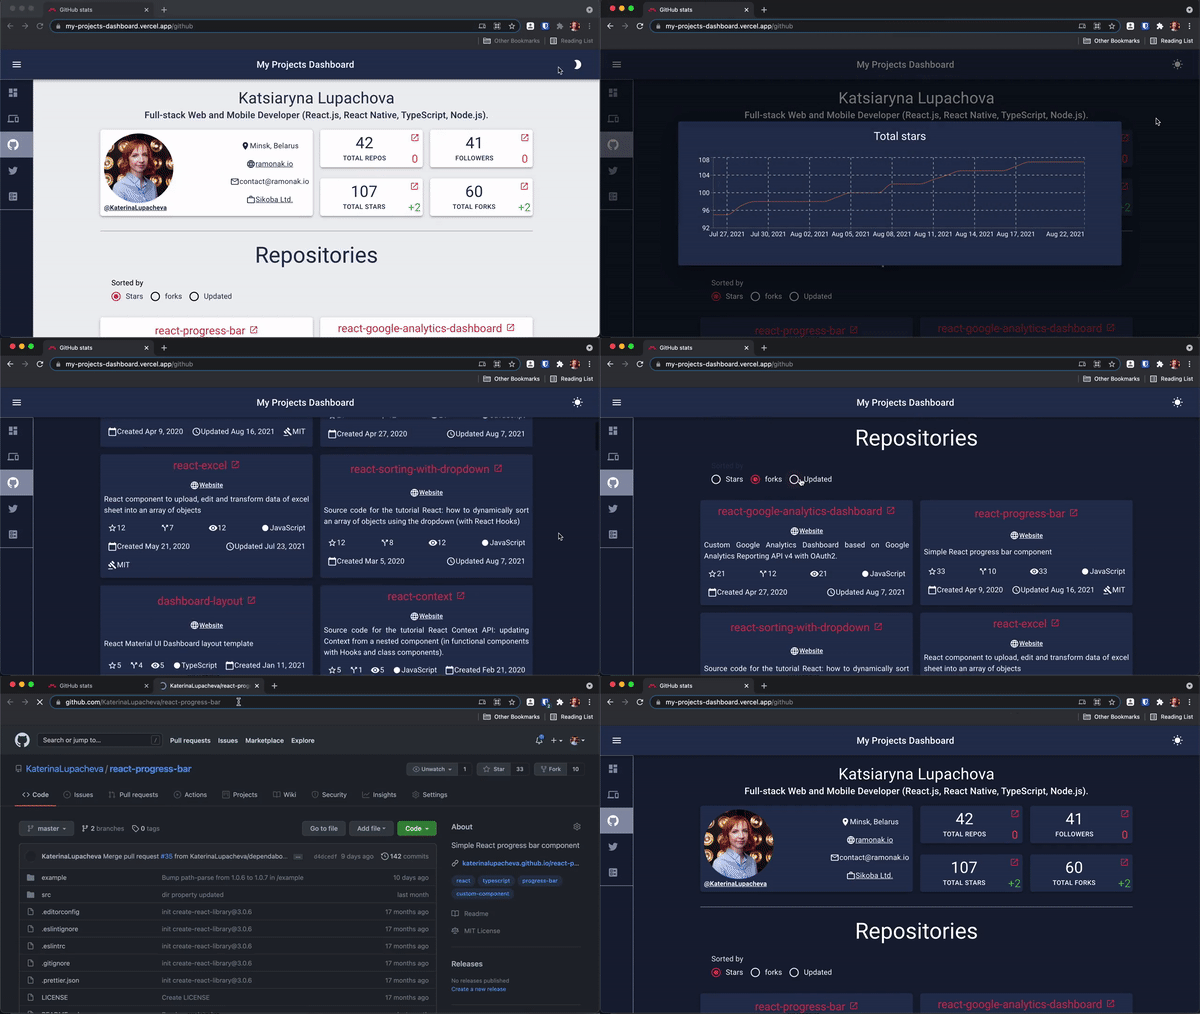
Before using GitHub REST API you need to create a personal access token. Here are the instructions on how to do so.
At the top of the page, the general GitHub user profile data and main stats indicators are shown. A user profile data is a response from https://api.github.com/user endpoint and it includes:
- name
- bio
- avatar
- location
- company and other profile information.
The followers’ count and the number of the public repos are also coming from the above-mentioned endpoint.
But the data about total stars and total forks amount is calculated based on each repo data. To get the information about all user’s repos you should query https://api.github.com/user/repos endpoint.
Same as for dev.to followers count, the data on GitHub total repos, total followers, total stars, and total forks is stored daily in the database with the help of the scheduled GitHub action.
The repositories section of the page displays cards with each repo data, such as:
- repo name
- website (if exists)
- description
- number of stars, forks, watchers
- language
- created at and updated at dates
- license
The cards are sortable by stars (default), forks, and the last update date.
I have a separate app that utilizes GitHub REST API - GitHub API dashboard, that I’ve developed a while back and probably need to update. A user can enter any existing GitHub username and see public information on that user, including profile information, a person’s programming languages structure, and repos data.
Page 4 - Twitter stats
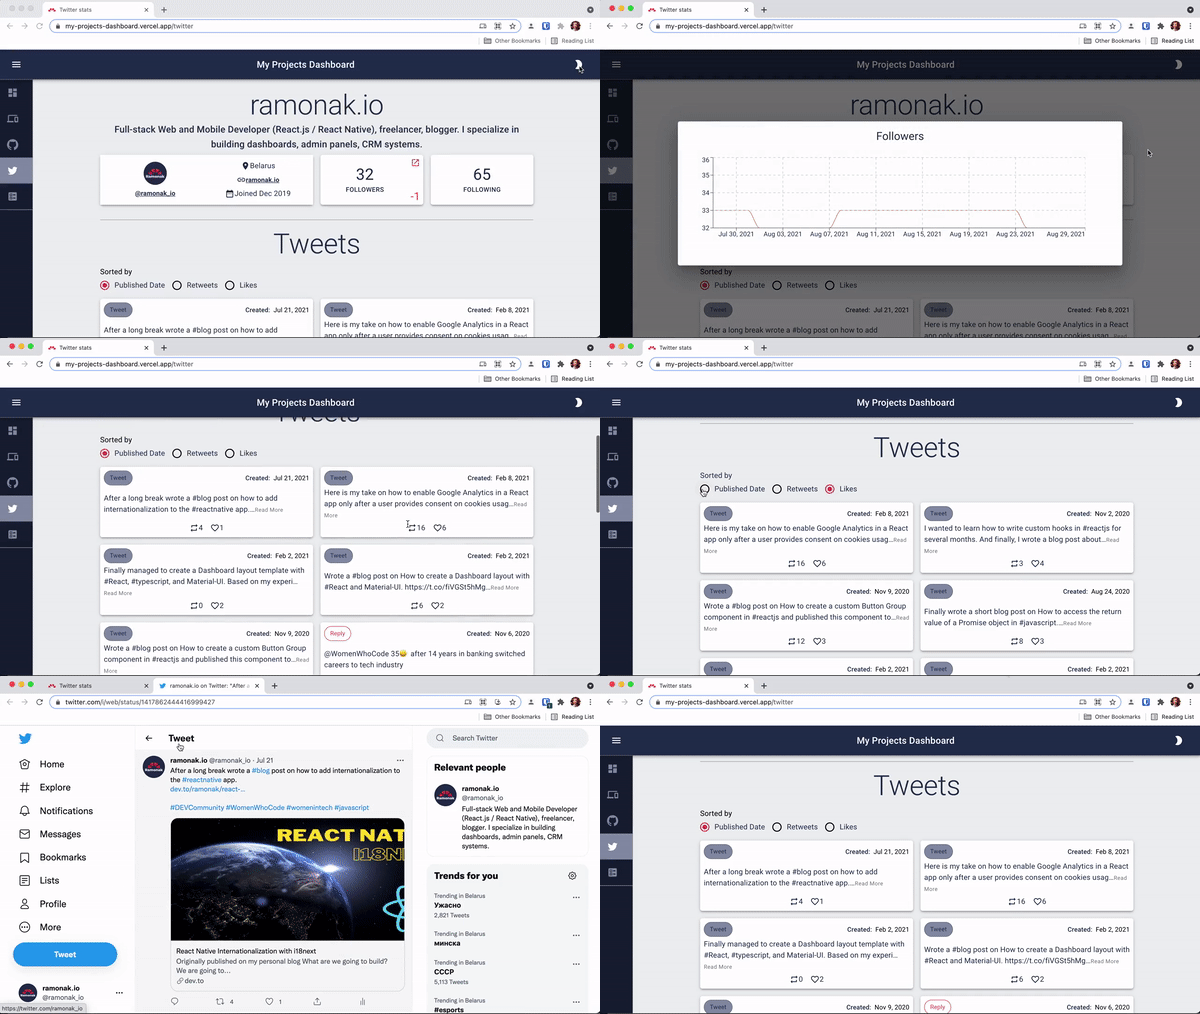
I’m not a very active (mildly speaking) Twitter user. I mean I do read other people’s tweets, but do not tweet myself often. Maybe this will change eventually, but it is what it is now.
As it’s stated in the docs, to get access to the Twitter API you need to:
- apply and receive approval for a developer account
- get your app’s key and tokens.
Specifically for my dashboard, I use v1.1. of the API and Bearer Token for authorization.
The top section of the page displays general information about the Twitter profile. This data comes from https://api.twitter.com/1.1/users/show API and includes:
- screen name
- name
- description
- location
- when a profile was created
- followers count
- image URL and so on.
Same as for dev.to and GitHub followers count, the data on Twitter followers is stored daily in the database with the help of the scheduled GitHub action.
The data in the Tweets section of the page comes from https://api.twitter.com/1.1/statuses/user_timeline API. This API returns a tweet’s text, date of publishing, retweets and likes count, etc. I visually distinguish if a tweet was a reply to some other tweet and a tweet by itself.
If a tweet returns from the API truncated, I compute a link to its full content.
The tweet cards are sortable by published date (default), retweets, and likes.
Page 5 - NPM packages stats
While developing a piece of functionality for any projects that I’m involved with, sometimes I publish it as a public library on NPM. Thus any developer (myself included) can use it, and I feel great that I can do something useful for a community.
If you’d like to publish your library, I wrote the blog post on how to publish a custom React component to NPM.
There is no need to obtain an API key or token for querying NPM registry API. For the dashboard, I use only the endpoint that provides the data about a package downloads count - https://api.npmjs.org/downloads/. You can read more about it here.
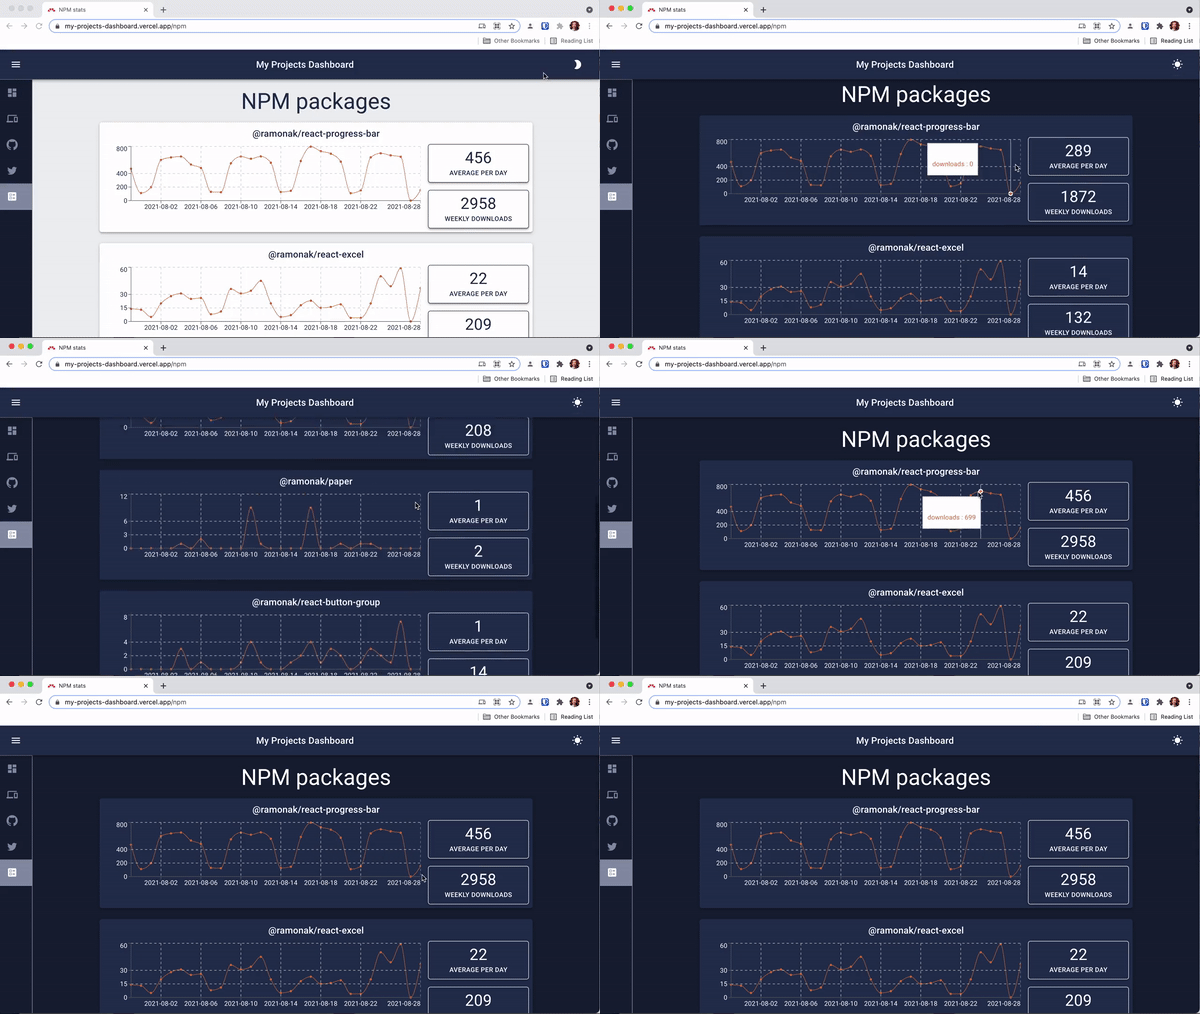
I have 4 public NPM libraries at the moment. There are stats on each of them in the dashboard:
- a chart with the daily downloads count for the last month
- an average downloads per day (calculated)
- weekly downloads
As you can see, the React progress bar library has the biggest downloads count among my libraries so far. The robust UI components libraries are great, and I love to use them. But sometimes you just need one simple customizable component. And I had exactly such a use case. Here is the blog post about how to create a custom progress bar component in 5 minutes.
Conclusion
The source code for my personal dashboard is available in this repo. And here is the live version (deployed on Vercel).
